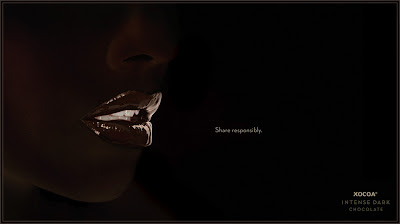
The Dark Side Of Chocolate
A sweet job for retoucher Michael Tompert involved bringing this delicious confection to life.
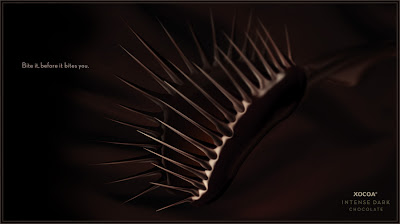
May 02, 2007 By Hal Stucker. Chocolate has earned a place in the collective fantasy life of the human race, symbolic of sex, love, pleasure and luxury. Those were the connotations that retoucher Michael Tompert of Raygun Studio in Palo Alto, California, and art director Michael Wilde of San Francisco's Maiden Lane Communications sought to capture in the campaign that Maiden Lane pitched last year to chocolate maker Ghirardelli. One of the images showed a Venus Flytrap made out of chocolate; the copy read, 'Bite it before it bites you.'"
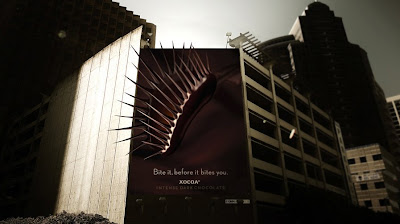
Michael created the chocolate "skin" covering each subject entirely from scratch, so his greatest challenge was making the objects in each image appear as if they were actually made from chocolate—the way chocolate Easter bunnies are.
For inspiration, he first went to the web and searched for pictures of chocolate, to get different ideas about the highlights, shadows and textures found in pieces of chocolate. He then undertook the informative, but potentially fattening, study of actual chunks of the stuff, viewing the samples with different types of illumination and studying the way light interacted with each surface. He soon discovered that the key to creating a believable image was in getting the color absolutely right. The ads were for dark chocolate, so he usually went all the way to black on the color and then came back a little, and added just the right mixture of reds and browns.
The ad that shows a chocolate eye and bears the tagline "Maybe you should be afraid of the dark" provides a good example of some of the intricacies involved and some of the creative choices Tompert made. The initial image came from a royalty-free stock photo.
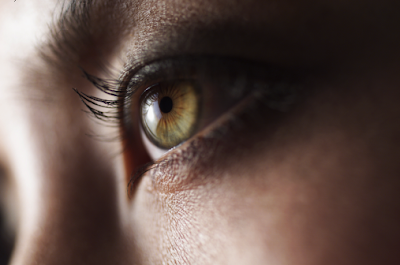
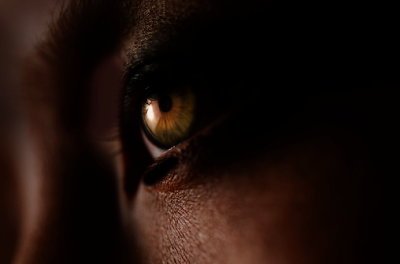
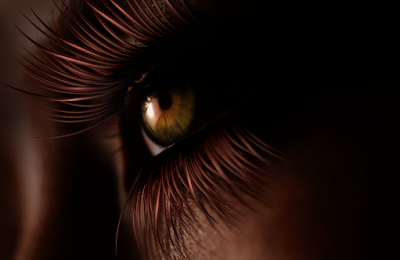
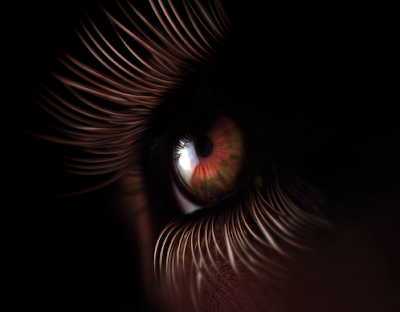
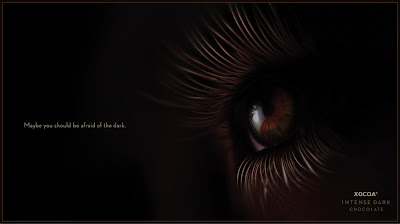
He first masked out the skin and used curves to take the color down to a dark brown, while also painting black into the shadows to make those even darker, and also using masks to selectively add red and brown tints to highlights and mid-tones. He then began drawing the eyelashes, first drawing a path to create the shape, then using the smudge tool to "finger paint" in the color on the path, and to create blur and give the lashes the effect of depth-of-field falloff. "It's all in how you control the smudge effect, how much you control the fade-out and the strength of the smudge that makes it sharp or blurred, and also in the shape of the 'finger' you're using to apply the tone."
Chocolate starts out as liquid. So all the objects he created had to suggest that kind of flow, as if it had, at one time, been poured into a mold and then solidified. This meant that the points at which the lashes connected to the eyelid needed to have a slightly rounded, somewhat "liquid" look, which Tompert also achieved using the smudge tool. He used the same method to connect the spikes on the Venus flytrap to the "mouth" of the flower, also adding blur there to simulate falloff in depth of field.
To add highlights, he used Photoshop's layer effects and worked in screen mode removing the dark tone. He also placed the highlights on the undersides of the lashes, to give the subtle effect of light emanating from the eye, rather than the eye being illuminated by an outside source. Lastly, he used the dodge and burn tool to fine-tune both highlights and shadows.
On his first attempt, Michael had added a fair amount of red to the skin and the lashes, trying to give the effect of a matte-surface, similar to what you would find on a powdered-chocolate truffle. This, however, turned out to be the one instance where even a subtle change in color destroyed the effect. Tompert went back to the image, subtracted red and added black, further painted down the shadows, and added white to the eyelash highlights to increase contrast. He finished by also enhancing the highlight in the pupil, drawing a second shape over the existing highlight and then brightening and sharpening it to make it cleaner.
Alas, for all the hard work involved, Ghirardelli wasn't sold on the Maiden Lane pitch. Michael, however, is sanguine, pointing to his chocolate series as both an interesting exercise in visualization and a nice addition to his portfolio.
More tips and tricks: Creating the Venus Flytrap
Michael created this image almost entirely within Photoshop, using only a stock photograph of a piece of velvet for the background. After studying a number of photographs to understand the basic structure of the plant, he began by drawing the shape that would become the flower's left lip. "I wanted to make sure I was getting the reflections and the material right, and make sure I had the feel and the glossy look down," he says. Here he used Photoshop's layer effects to create a beveled edge on the lip and to add highlights and shadows. "It's a very deep function," he says of the effects. "Among the things you can do, you change the way light reacts to a surface, and you can position a light to provide a highlight."
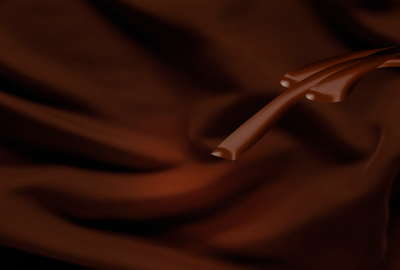
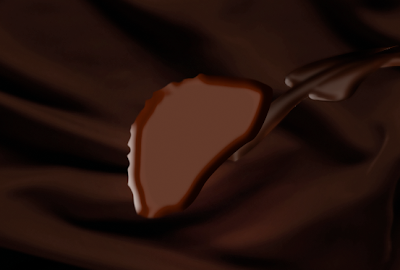
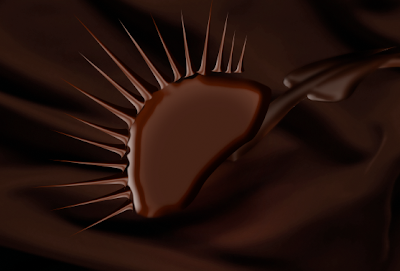
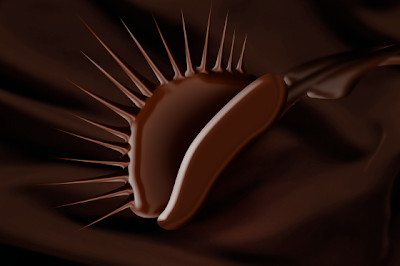
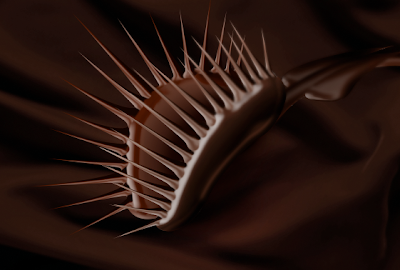
He then used the pen tool to draw the shape of the spikes, and filled the shapes with color. "In Photoshop, you can then give these shapes attributes," he says. "You can give them thickness, they can throw a shadow, they can accept light, like an object in a high-end 3D program. The layer effects won't necessarily get you all the way to where you want to go, but they'll take you about 90 percent of where you want to get the image." For example, the reflection the layer effect added to the spike dropped off too early, and didn't run to the end of the tip, so Michael had to smudge and paint in the rest.
Michael was also careful to keep edges rounded and plump, in order to give the effect of a molded chocolate object that had once been liquid. As a final touch, he used the smudge tool to add blur to selected parts of the image, to give the effect of falloff in the camera's depth of field.


No comments :
Post a Comment